Compose the YAML
Now that we know what Docker Compose is for, let’s put it to work.
In this step, we are going to create a minimal compose.yaml file that describes both of our services in one place:
- the API service
- the database service
The Compose File
Section titled “The Compose File”In the root of our project, create a file named compose.yaml.
For this first version, add:
services:  api_service:    build: .    ports:      - "3000:3000"
  db_service:    image: mongo:8.0
That little file replaces quite a lot of manual setup.
Breaking It Down
Section titled “Breaking It Down”At the top level, we have a services: block.
This is where we list the containers that make up our application.
In this example, we have two services:
api_service— built from the current project folderdb_service— created from the official MongoDB image
Each service gets its own configuration block underneath.
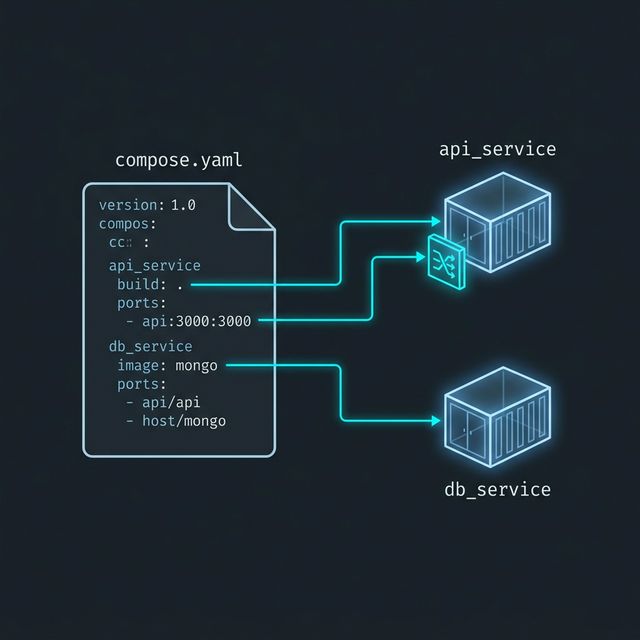
Figure 1: The Blueprint into Reality. Each section of our ‘compose.yaml’ file translates directly into a Docker object: ‘build’ instructions create images from source code, ‘image’ tags pull pre-made tools, and ‘ports’ open specific gates into our private network.
The API Service
Section titled “The API Service”Our API service uses:
build: .That tells Compose to build the image from the current directory.
In other words, Compose will look for the Dockerfile in this folder and use it to build the API image for us.
We also have:
ports: - "3000:3000"That maps port 3000 on our machine to port 3000 inside the API container, so we can reach the service in a browser.
The Database Service
Section titled “The Database Service”Our database service uses:
image: mongo:8.0That tells Compose to create the container from the MongoDB image directly, without building anything locally.
This is a nice example of how Compose can manage different kinds of services in the same file:
- some services are built
- some services are pulled from an image
Not every service needs a Dockerfile in our project.
Our own app is usually built from source, while supporting services like MongoDB, Redis, or PostgreSQL are often started directly from official images.
What About the Network?
Section titled “What About the Network?”We may notice there is no networks: block here.
That is one of the nicest Compose conveniences.
By default, Docker Compose creates a private network for the project and connects all declared services to it automatically.
That means the services can already reach each other by service name.
So later, api_service can talk to MongoDB by using db_service as the hostname.
Very civilized.
This first Compose file is not the finished setup.
It is just the starting point.
We still have more to do around configuration, environment variables, and making the services cooperate properly.
Why This Already Feels Better
Section titled “Why This Already Feels Better”Even in this tiny version, Compose is already cleaning things up.
Instead of manually remembering:
- network creation
- image builds
- container names
- port mappings
- startup order
we are starting to describe the system in one place.
That is the real win.
Extra Bits & Bytes
Section titled “Extra Bits & Bytes”Compose File Services Reference
⏭ Running the Stack with Compose
Section titled “⏭ Running the Stack with Compose”Now that the file exists, let’s use it to launch both services together and see how much manual work just disappeared.